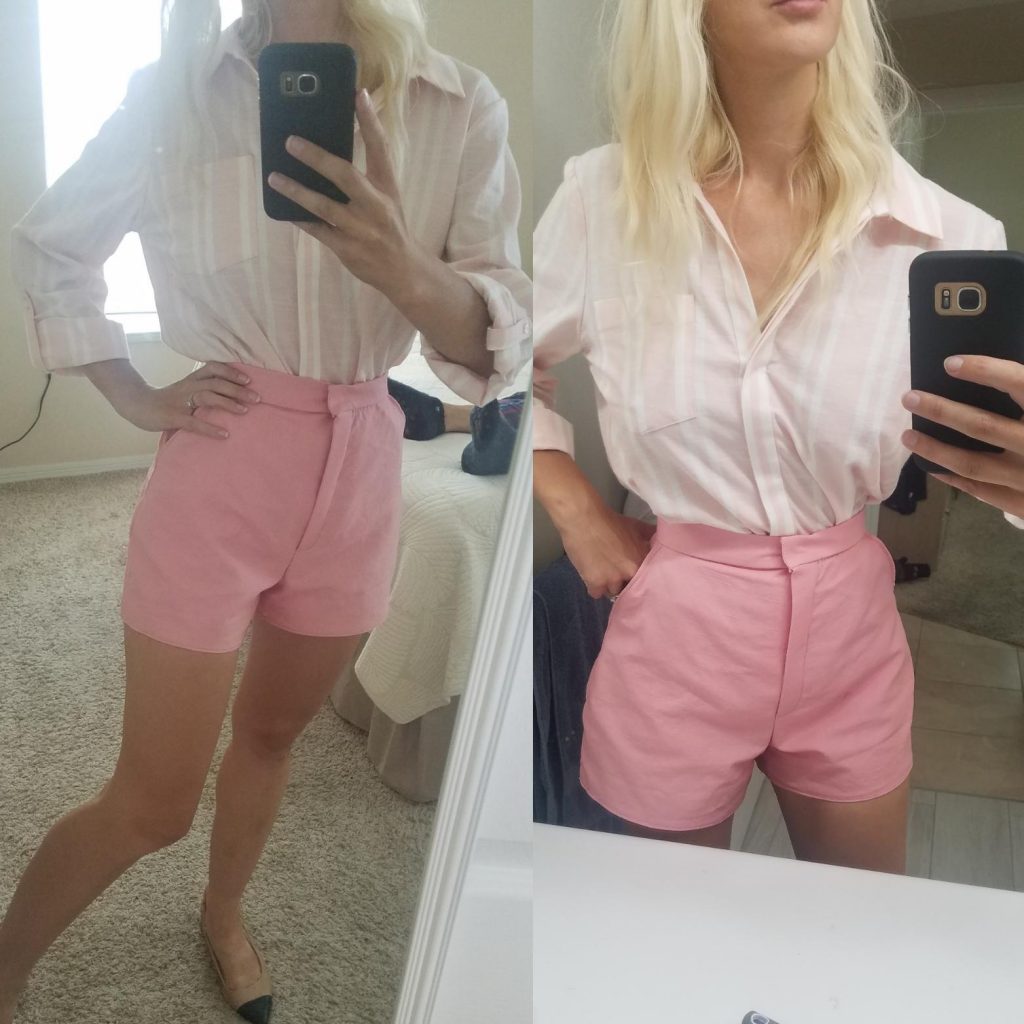
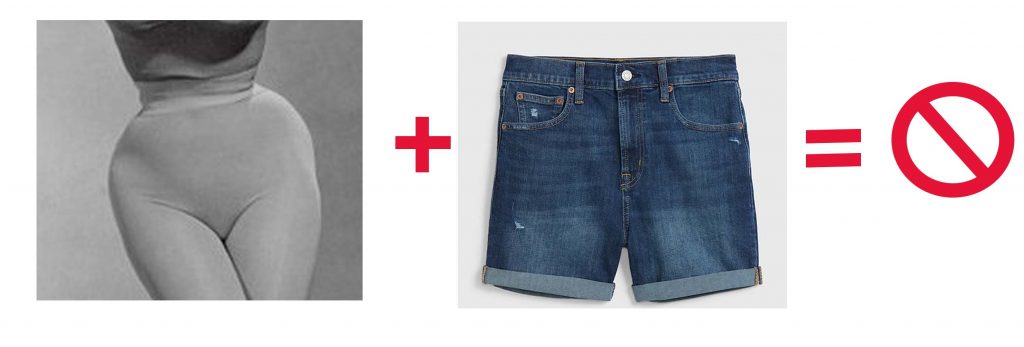
There is one article of clothing I have never been very fond of wearing, and that is a pair of shorts. I have always found shorts to be unflattering and difficult to fit properly on my body. Any woman with wide hips in contrast to her waist knows the struggle.
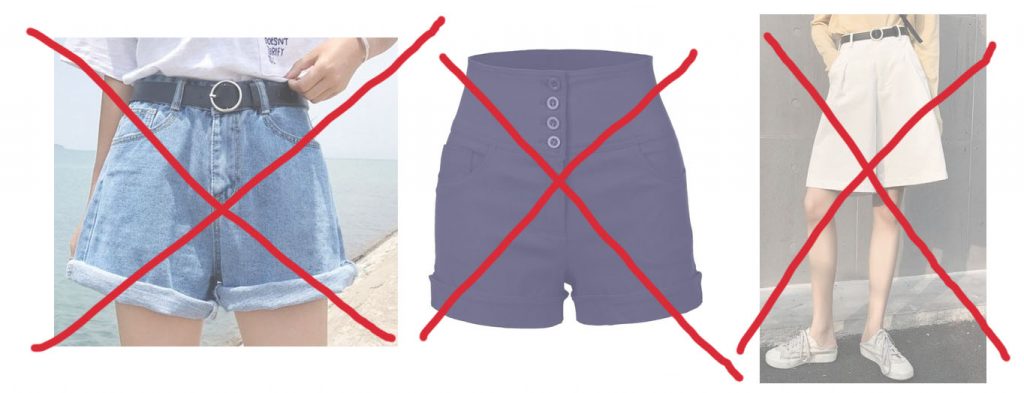
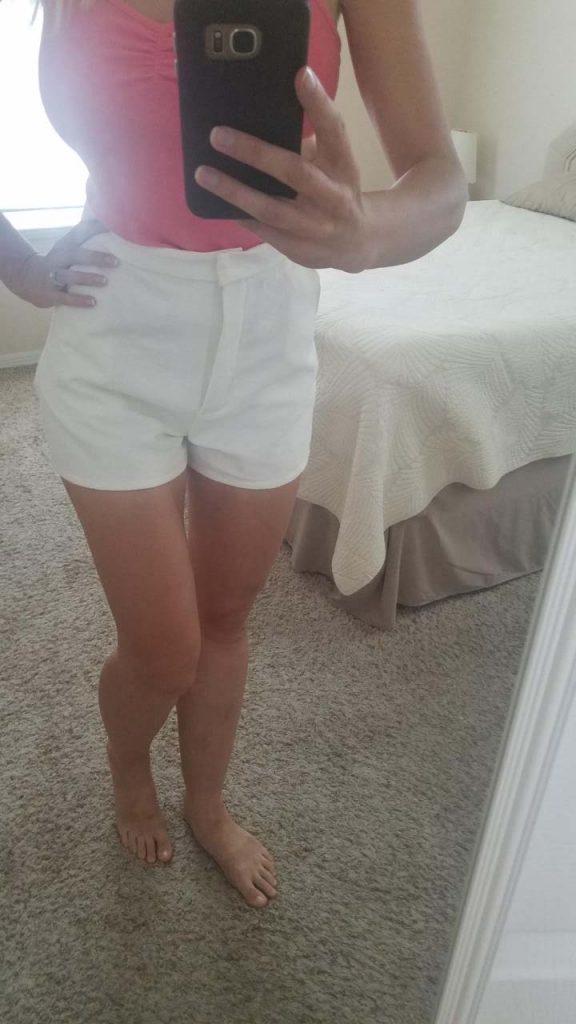
It wasn’t that I didn’t want to wear shorts, in fact, I had in mind a precise vision of what I’d like to wear… if I could find them, that is. First, my ideal pair of shorts would be high waist, but they would NOT be the “mom jeans” style, or the costume-y high waist you can find in pin-up clothing shops. I wanted them to be quite tailored, and in a high quality, medium weight fabric. I did not want an elastic waistband (although I have sewn this type for my Miss Rockabillaque outfit). I had envisioned these shorts having a zipper closure, and a stiff waistband, a bit more refined than style I have sewn prior. What about the length? Well I didn’t want them too short, but I also didn’t want them to be long and matronly.
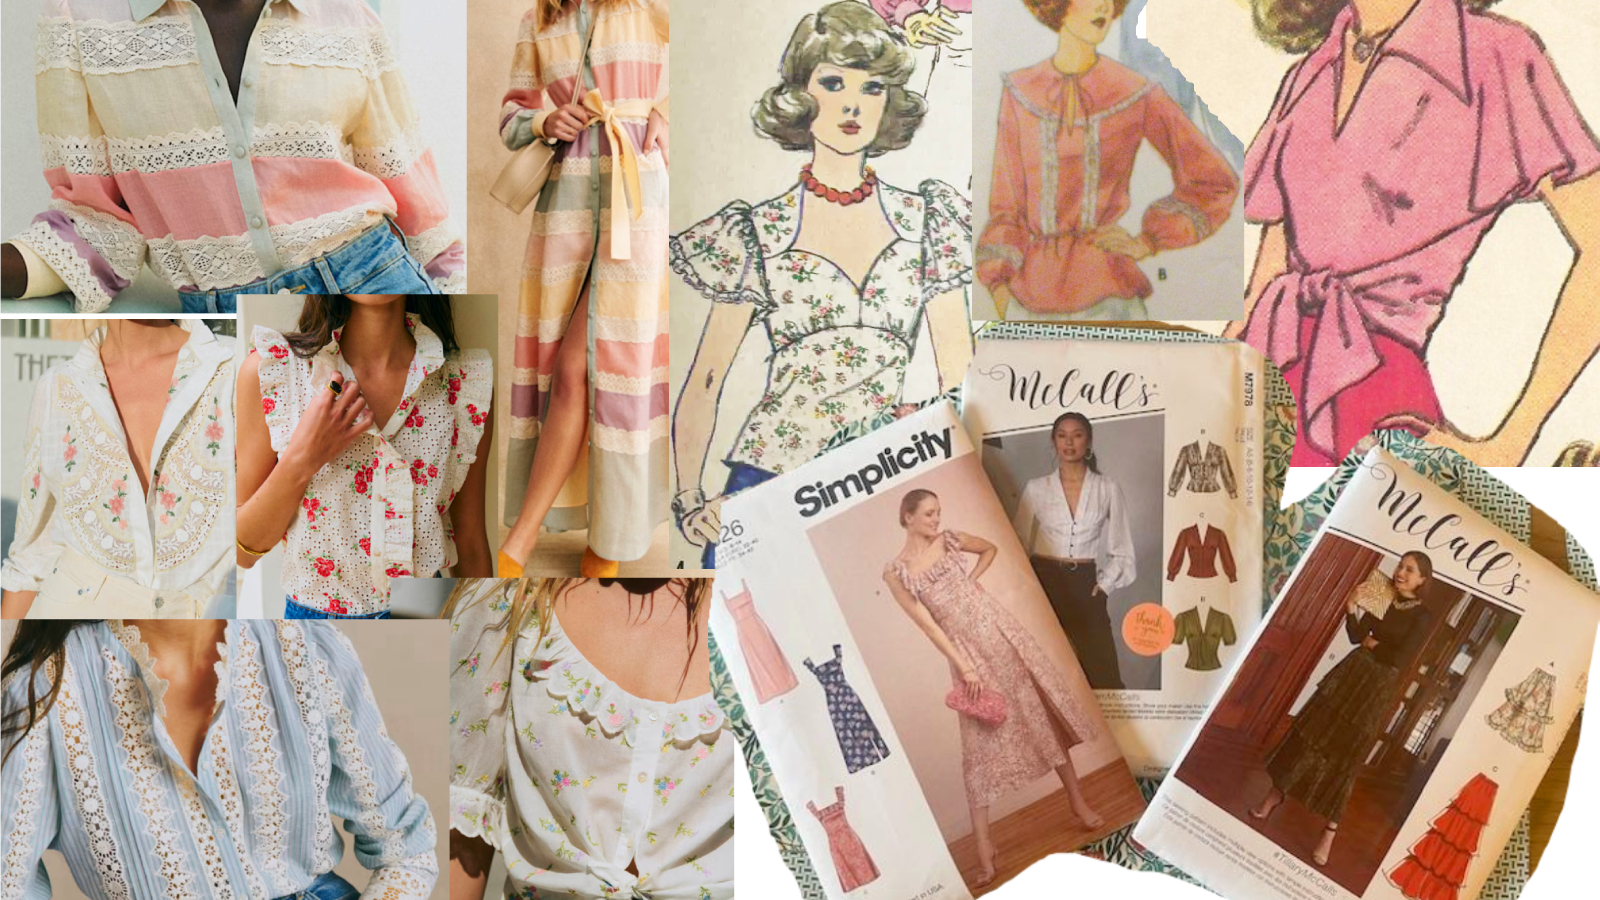
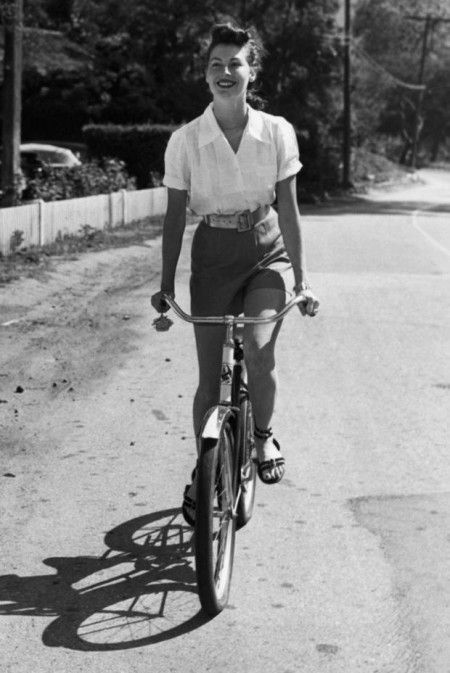
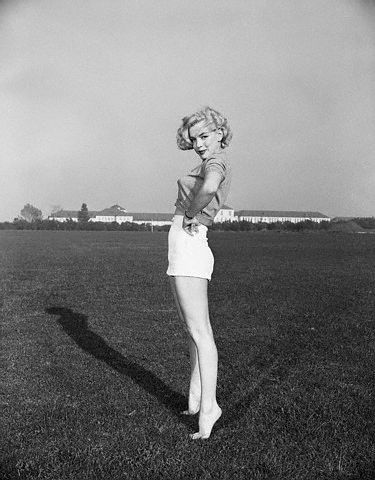
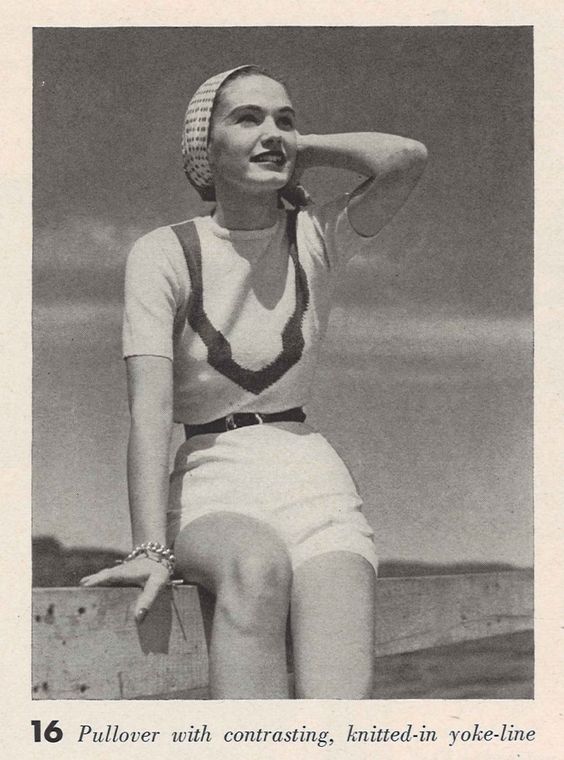
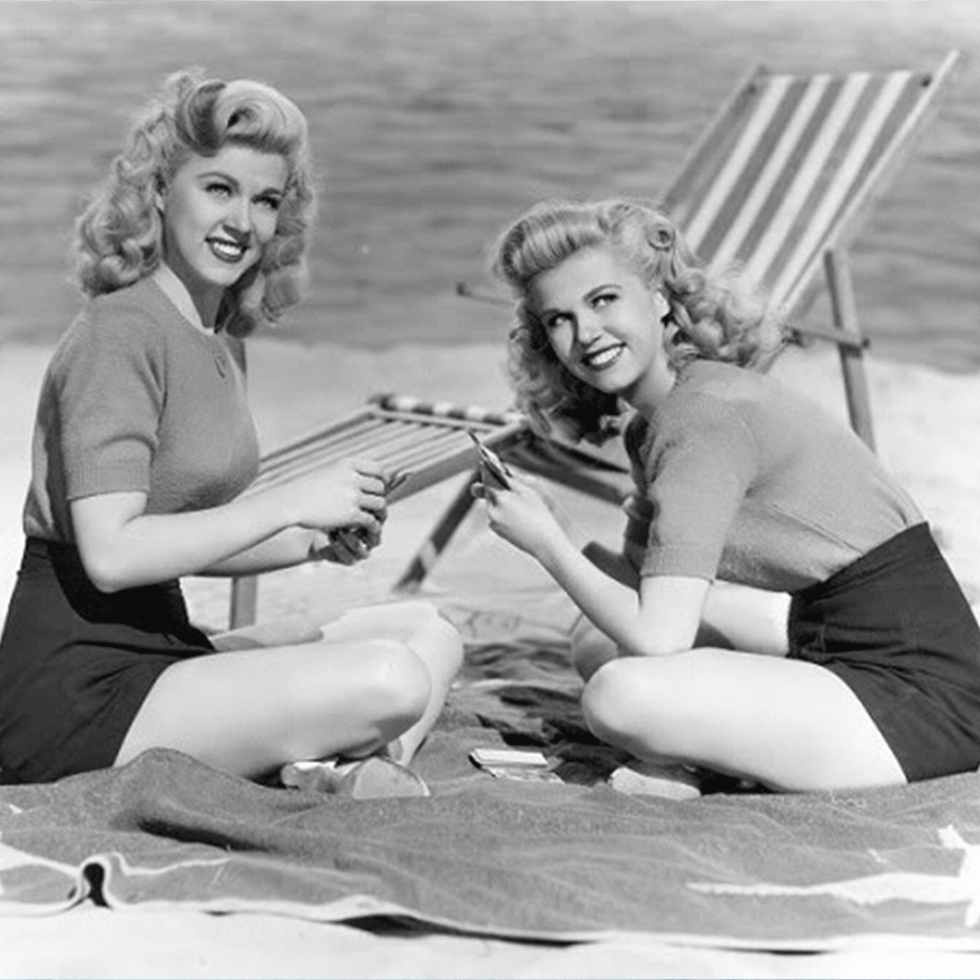
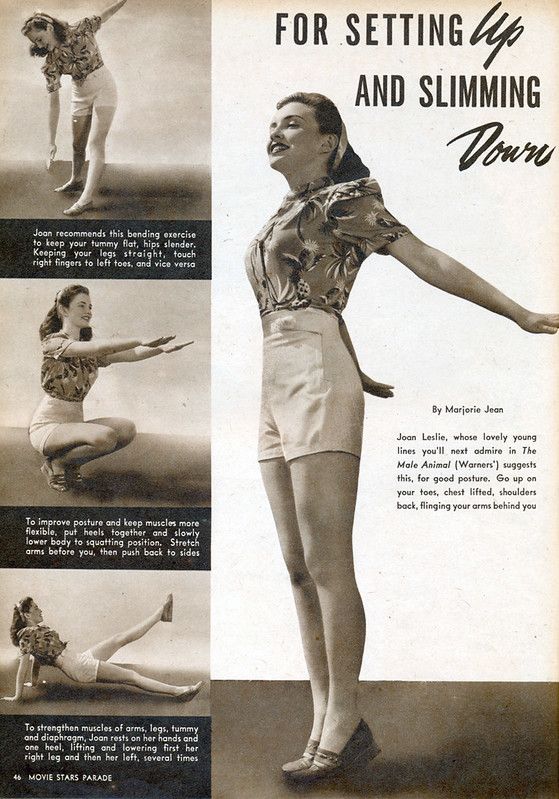
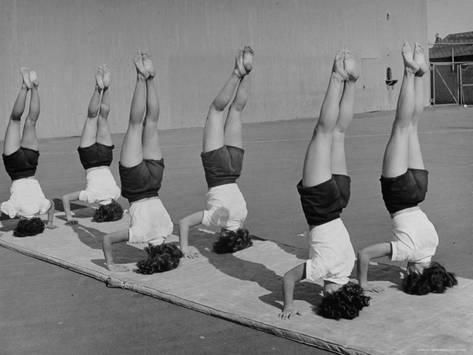
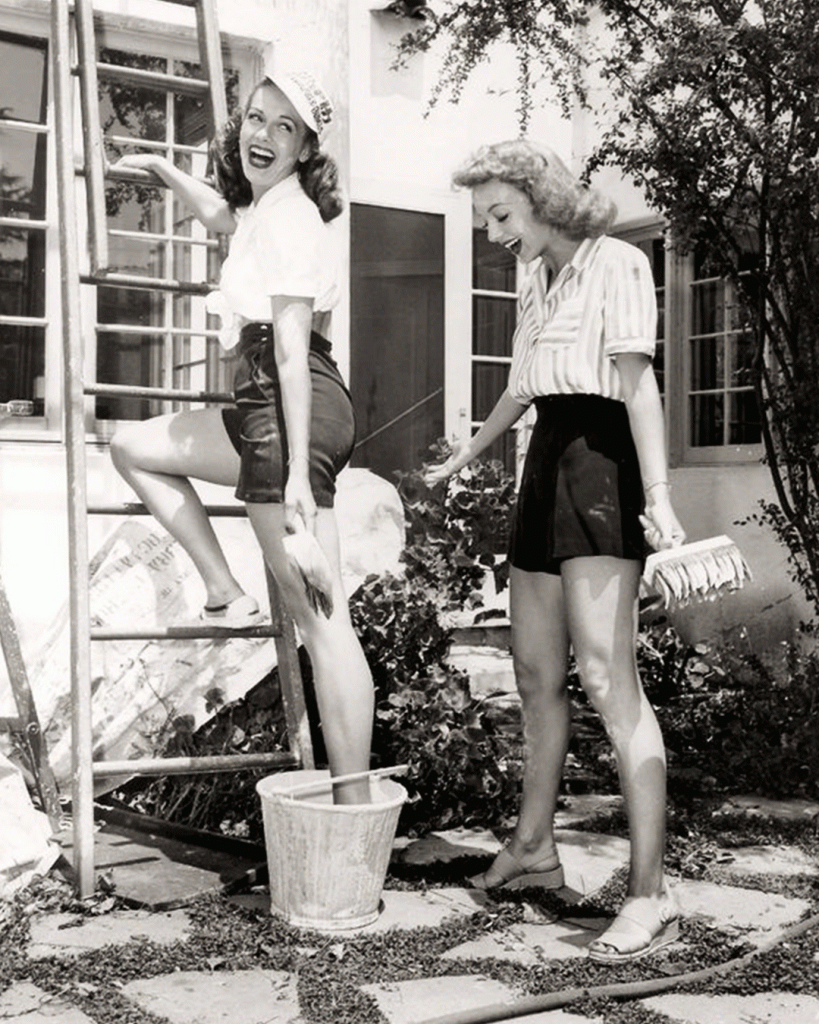
I feel like the shorts I envisioned, are what ladies would have worn to perform exercises in, during the 40’s or 50’s. More specifically, something much like the images below.
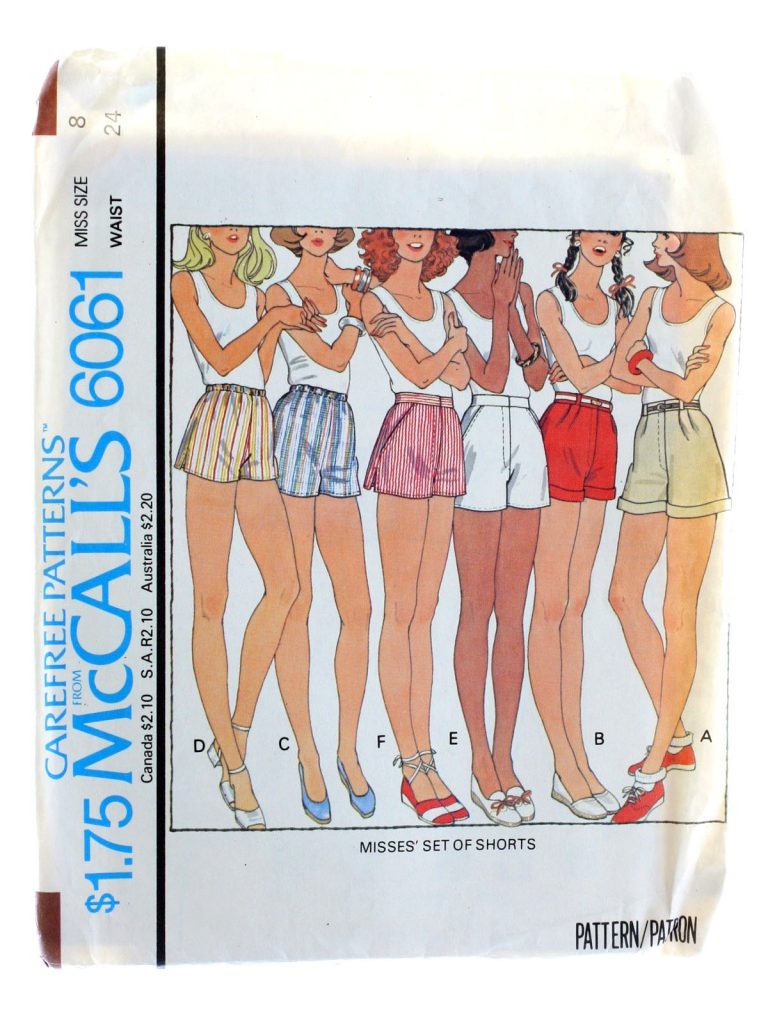
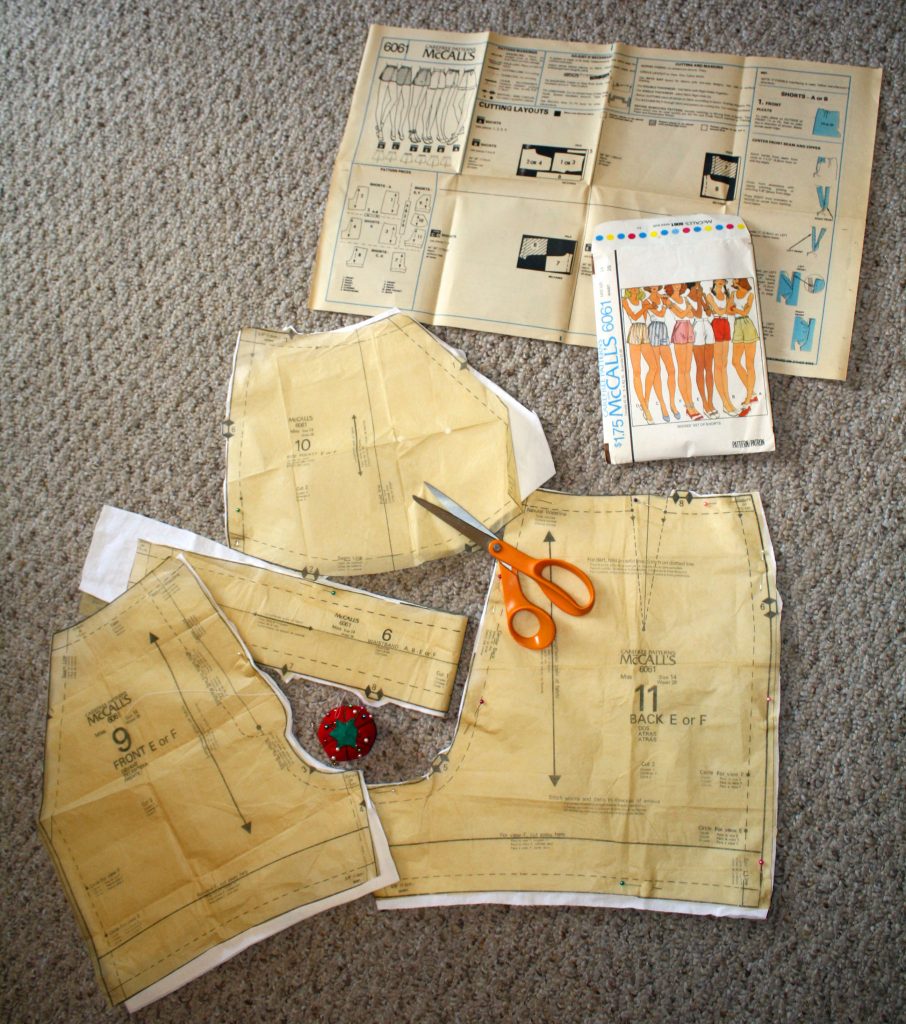
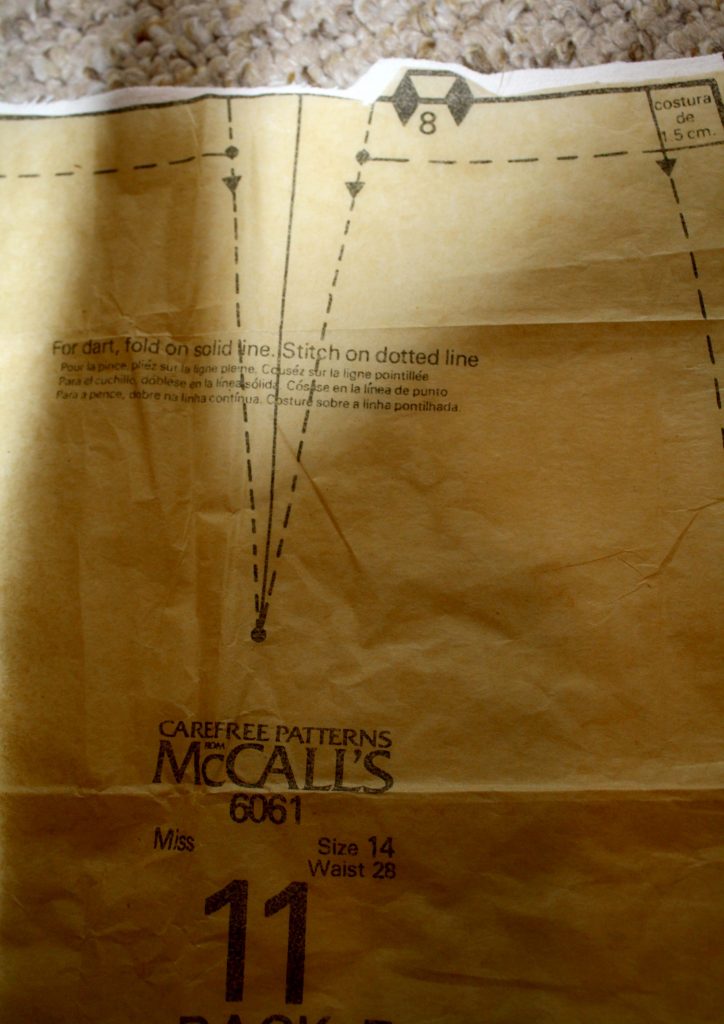
Finally I decided it was time to sew myself the shorts I envisioned, since I couldn’t find them in stores. I shopped around on Etsy and Ebay to find myself a vintage sewing pattern that would give me the silhouette I like. While initially I thought I would end up choosing a much older sewing pattern, I came across McCall’s 6061 from the 1970’s and it fit the look perfectly. This sewing pattern also provided me with many variations I might want to try later.
This project was my first time sewing a lapped fly zipper, (and my first time sewing front shorts pockets). Thankfully, I found this very useful video that walked me through the zipper process. I am so appreciative of the help I received from watching the video because when you read how to do it in print, it is far more complicated, than when you see it happen on screen. I can’t imagine trying to do this without that help.
If I can lend any help to an intermediate level seamstress like myself, who is currently trying to sew these shorts from McCall’s 6061, let me elaborate below with my process. I will break it up into 3 days, which is how I prefer to make them.
Day 1 – Cutting & Fusing
After day one of our project we will have the following accomplished…
All pattern pieces cut out of fabric
Fly interfacing cut out and fused
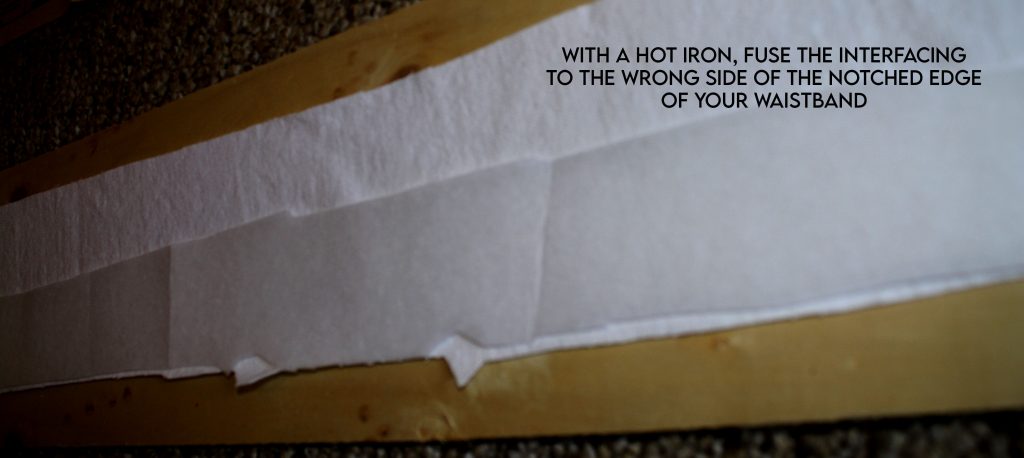
Waistband interfacing cut out and fused
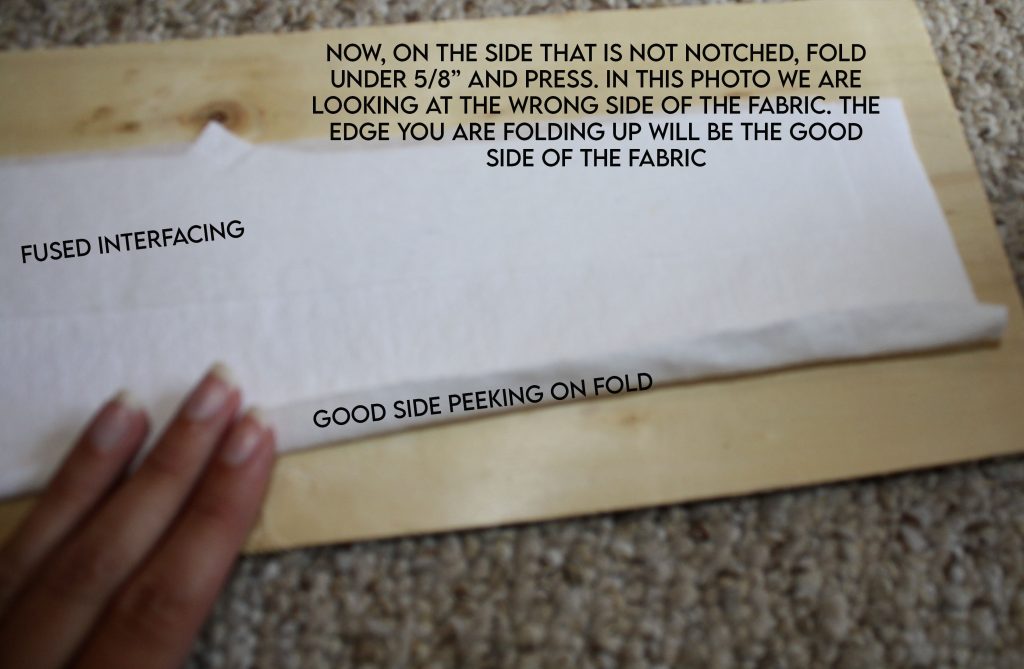
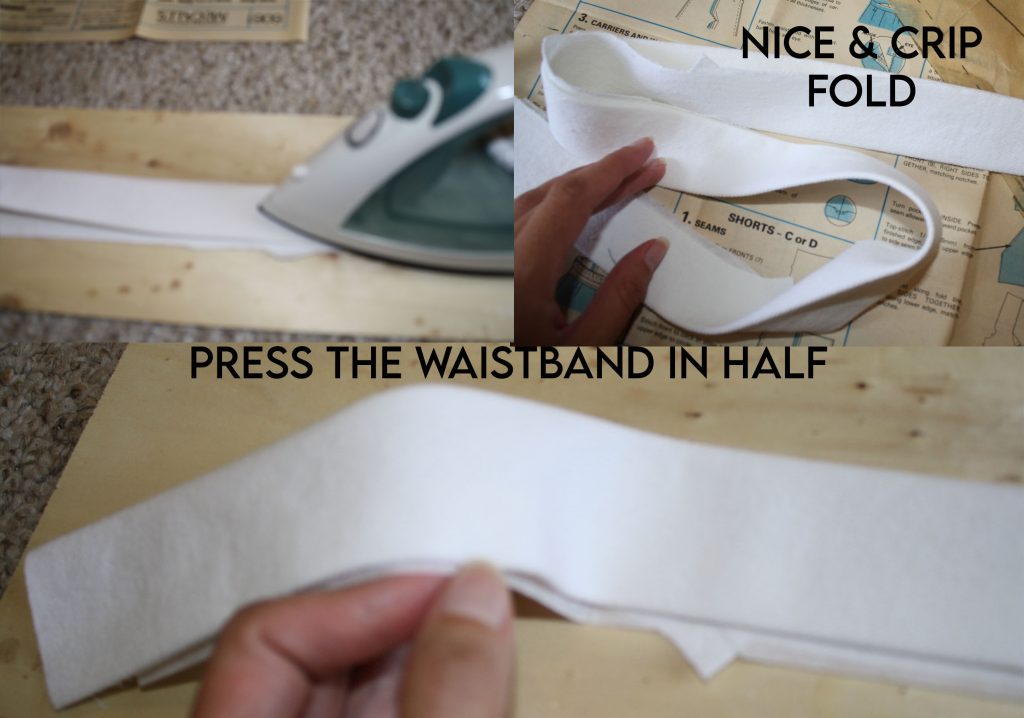
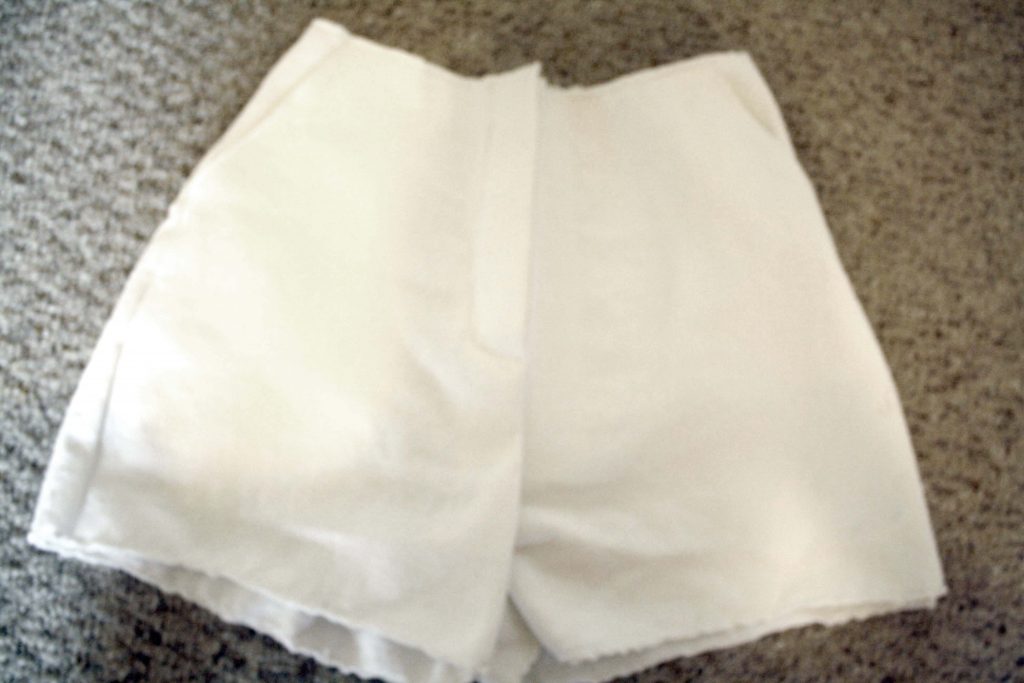
Waistband pressed and ready to work with later
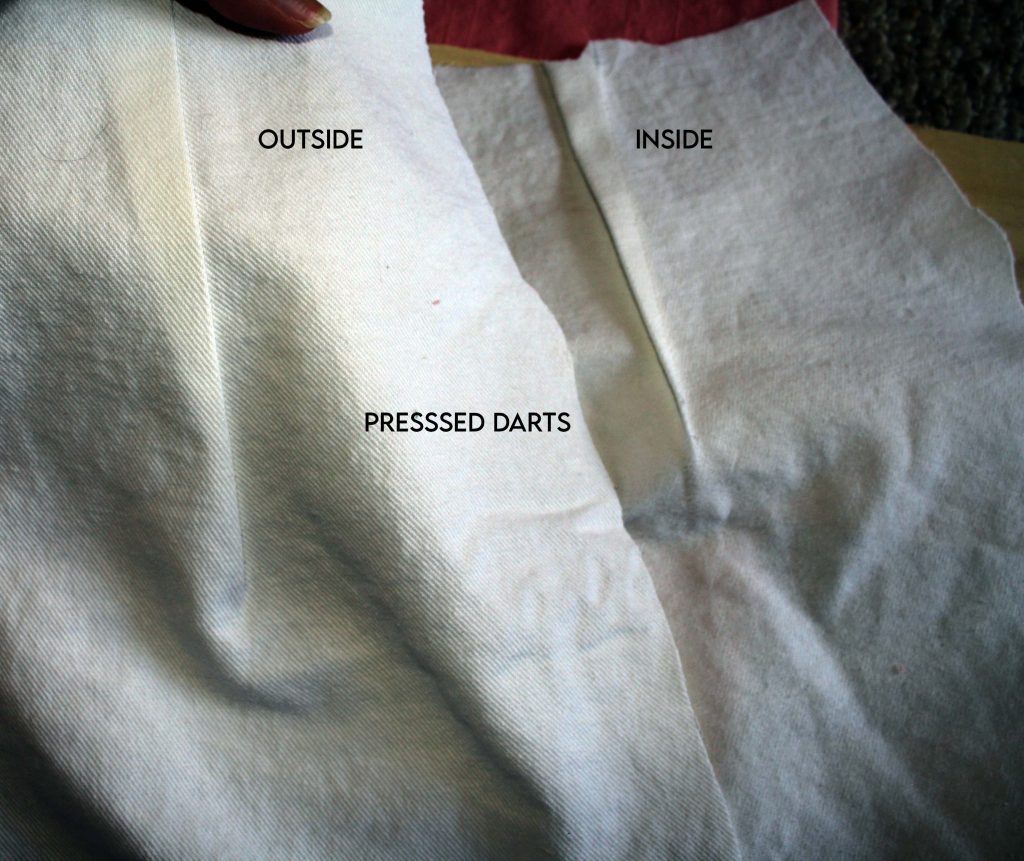
Back darts created and pressed
Let’s get started!
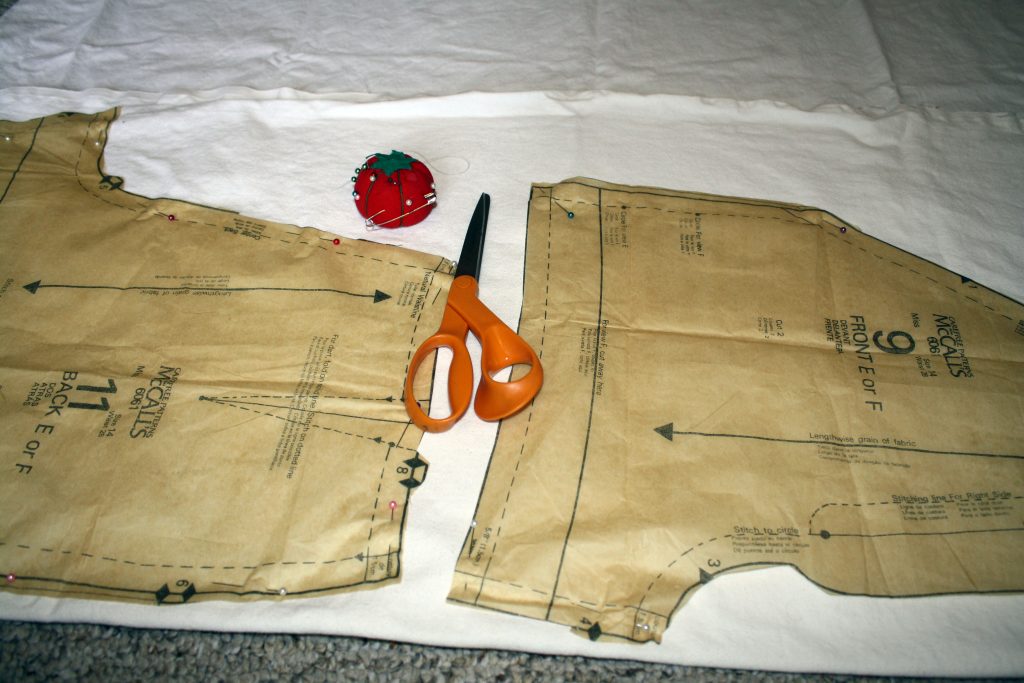
1.) Cut out all of the pattern pieces for view E from your fabric.
You need the following pattern pieces cut out 6, 9, 10, 11
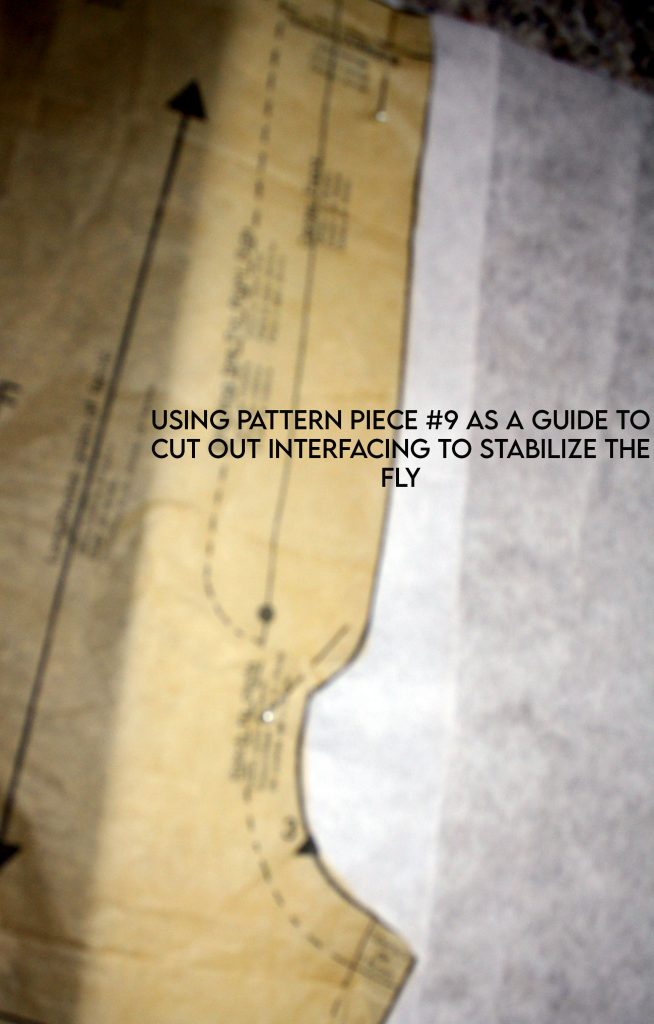
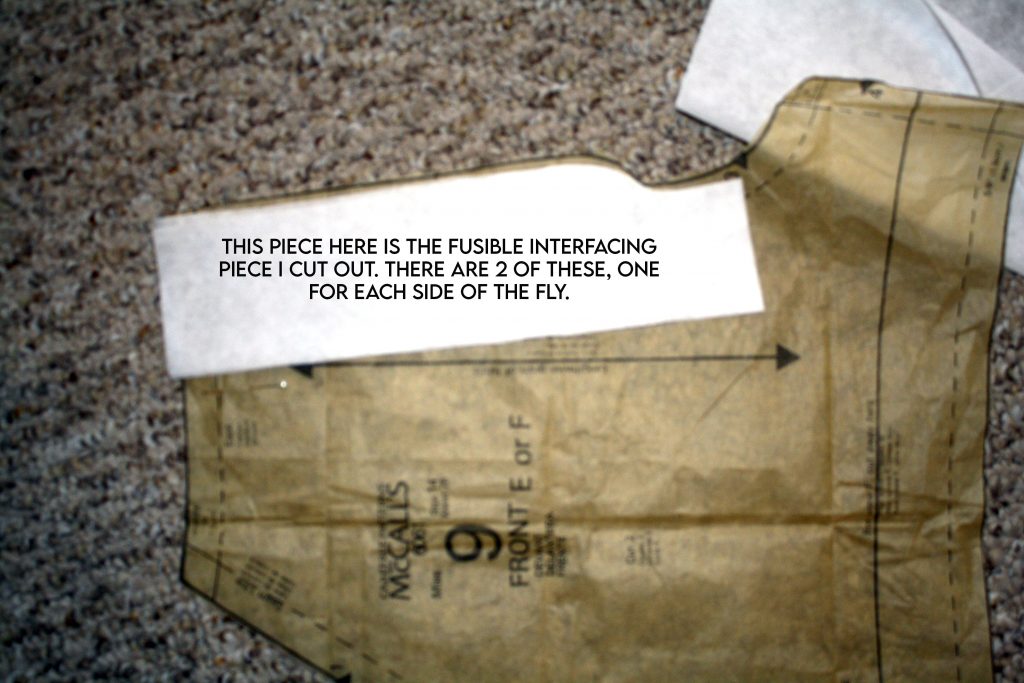
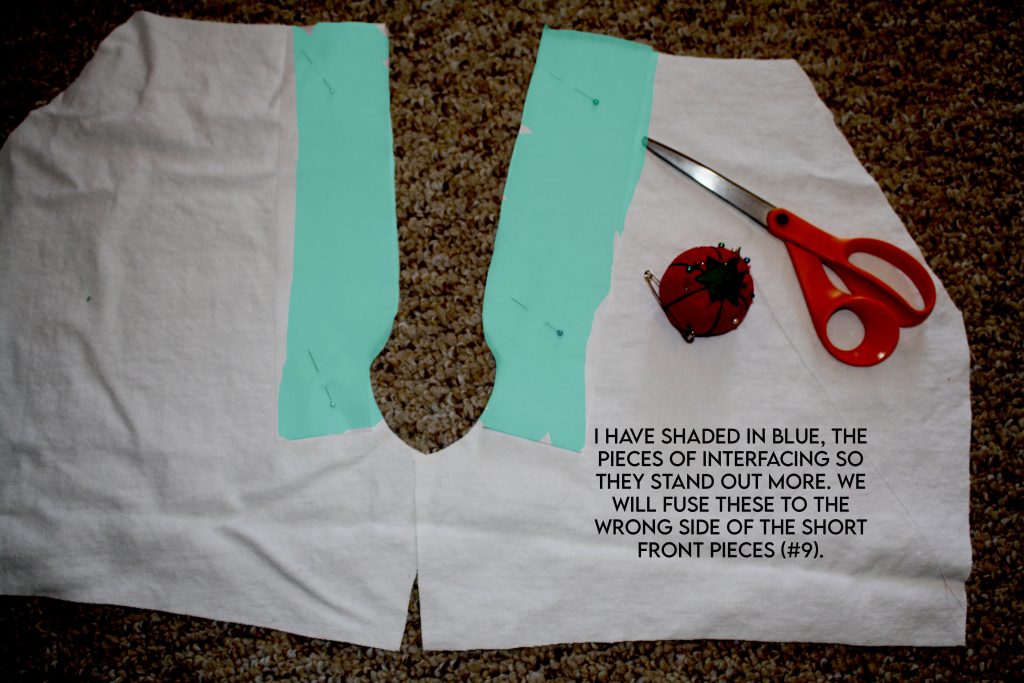
Next I used pattern piece #9 as a guide to cut 2 pieces of Pellon Fusible Midweight interfacing (Style# 931TD), which will be crucial for making a nice zipper fly.
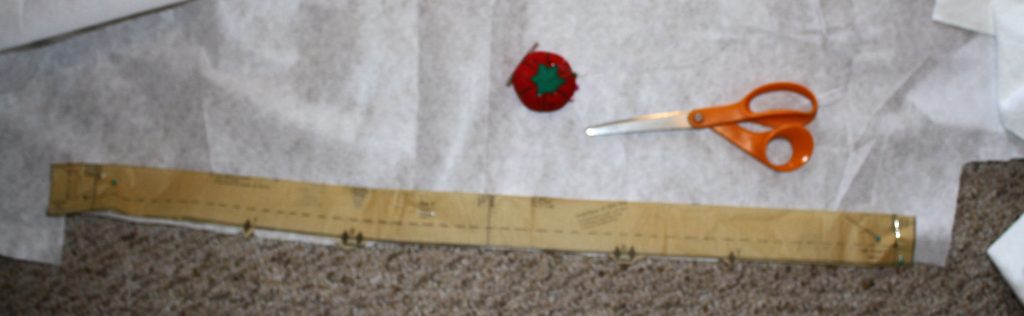
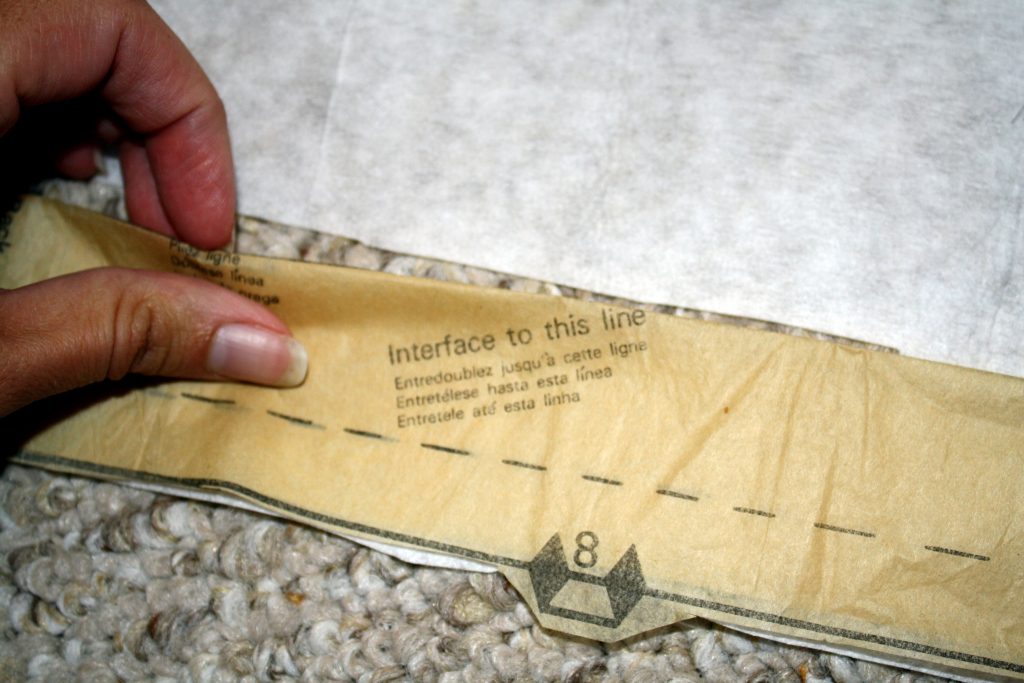
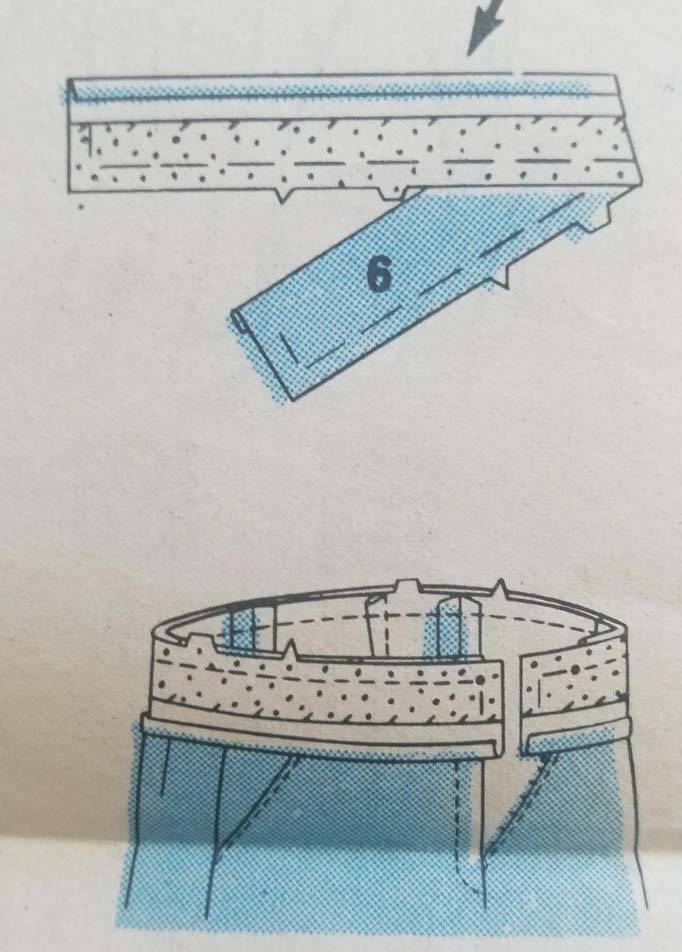
We now have our fly prepared with the interfacing, but we still have one more piece to prepare with interfacing, our waistband. So now take pattern piece #6 and fold it in half long ways. You will see that on the pattern piece, it will show you the area we will need to cut of our interfacing. I am using the same medium weight interfacing that I used above.
Finally to wrap up the day we will create our back darts. If you need help with darts, here is a Youtube video.
Day 2 – Fly Zipper, Pockets, Assembly Sewing
Today we will accomplish these steps:
Create the flat front zipper fly
Create two front pockets
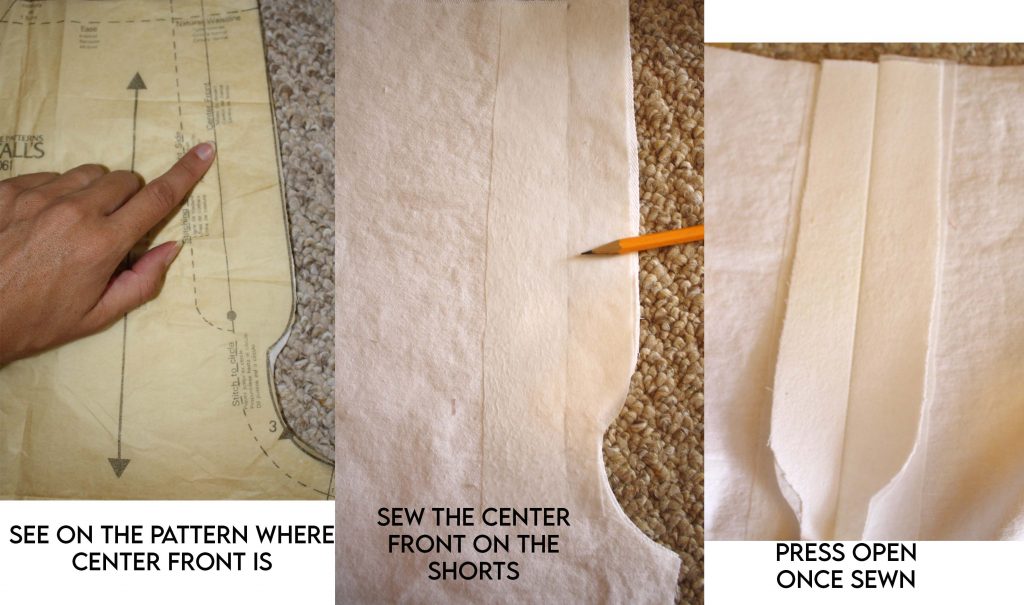
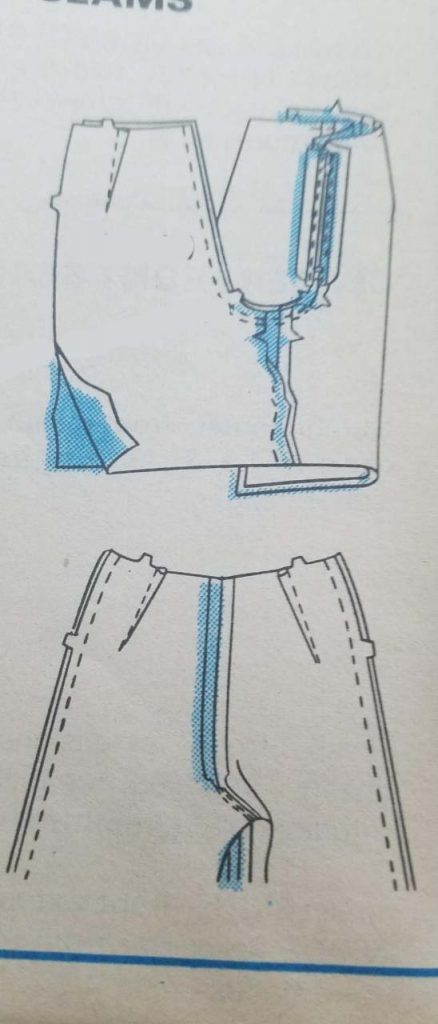
Assemble the shorts: sew the center back, sew the back to the front, sew the inseam
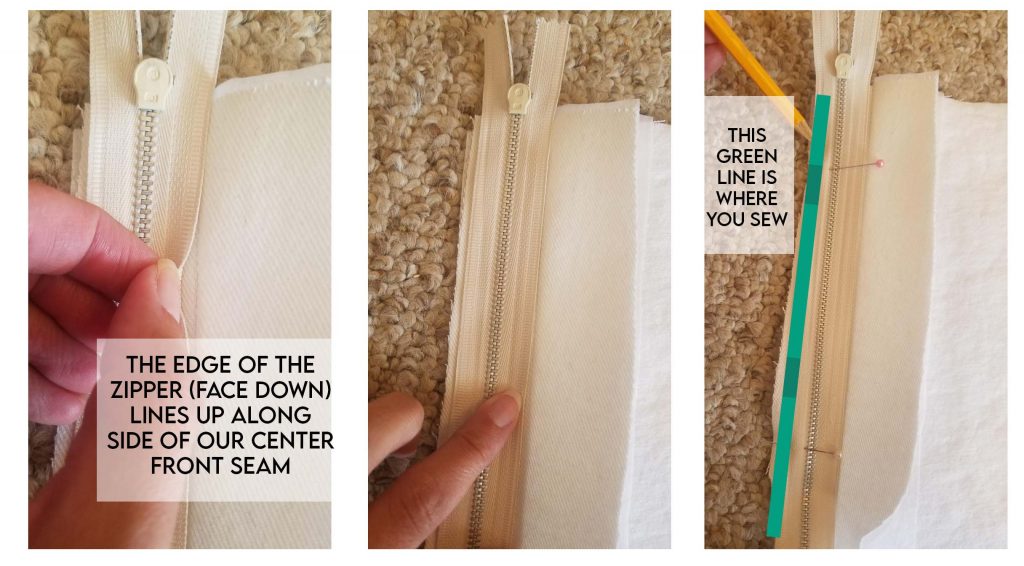
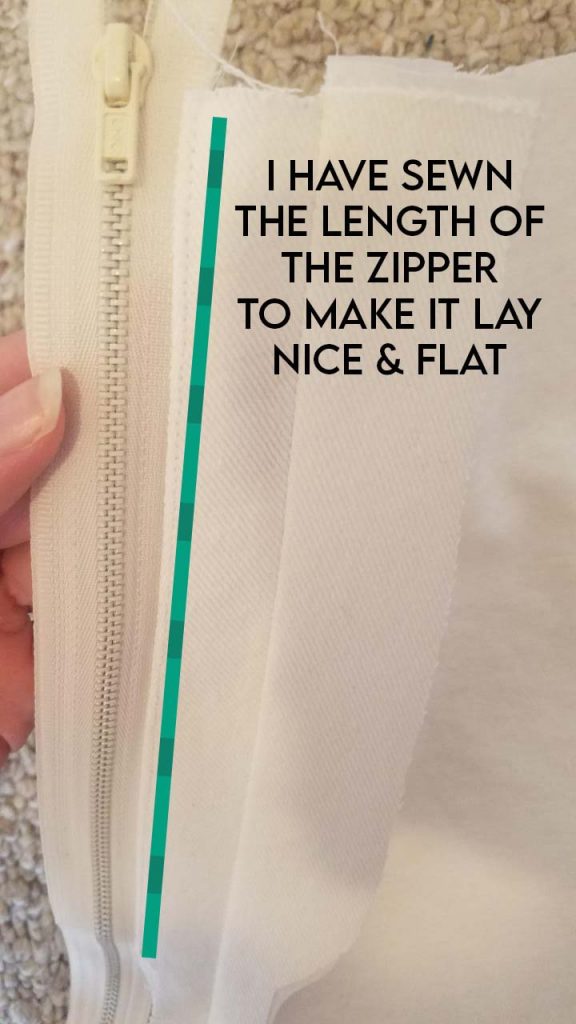
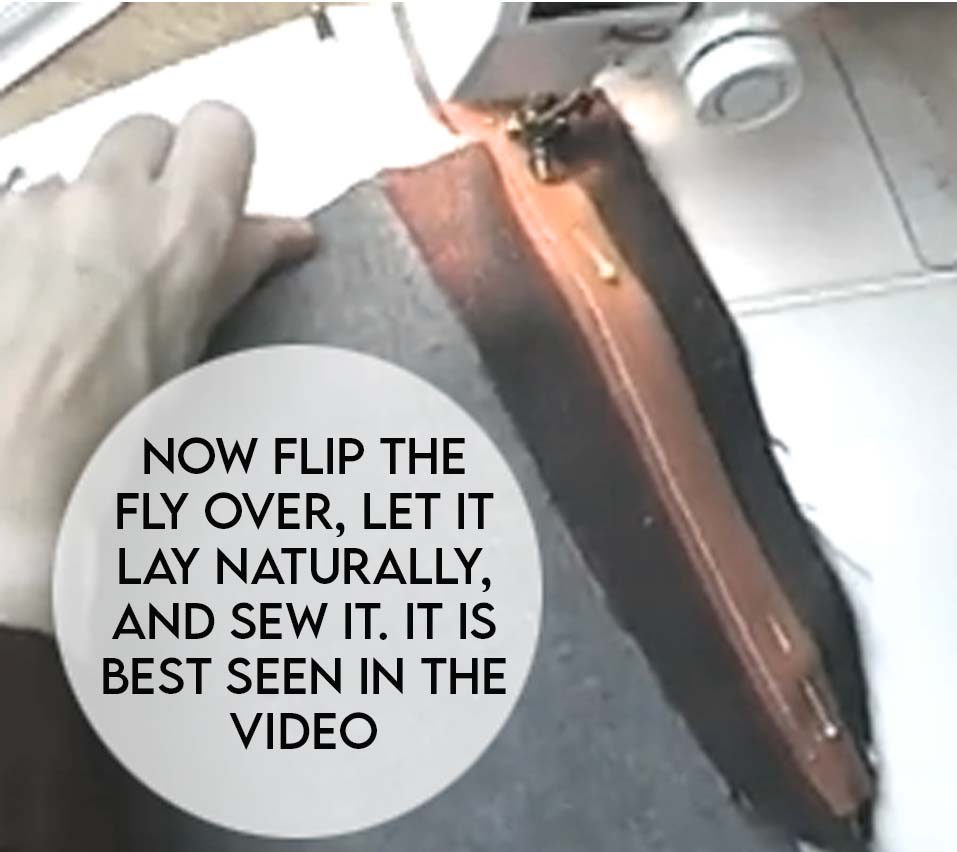
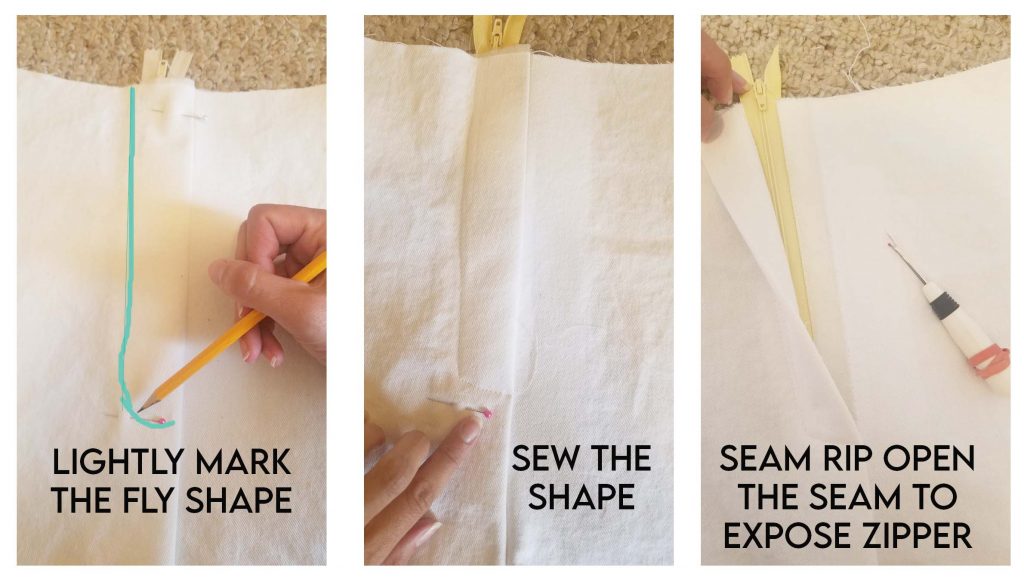
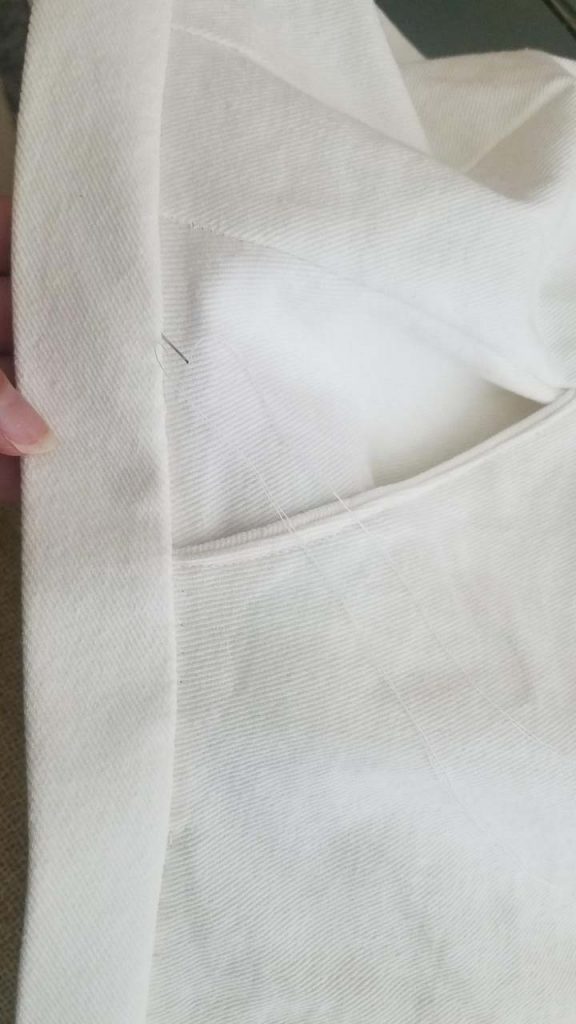
It was during this shorts project, that I had my first ever attempt at a lapped fly zipper. I can’t express enough how helpful this video was, thanks to Sandra Betzina and Threads magazine. I suggest you watch it several times, and pause it while working along side the instructions. I have included some photos below for more clarity, but please rely more on the video than on my photos. Again, this was my first try.
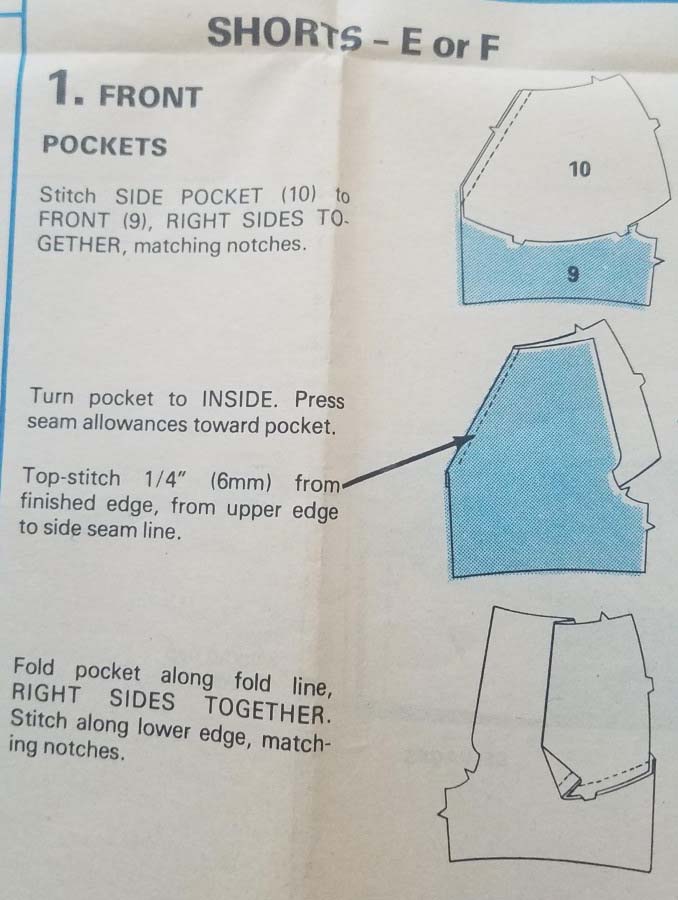
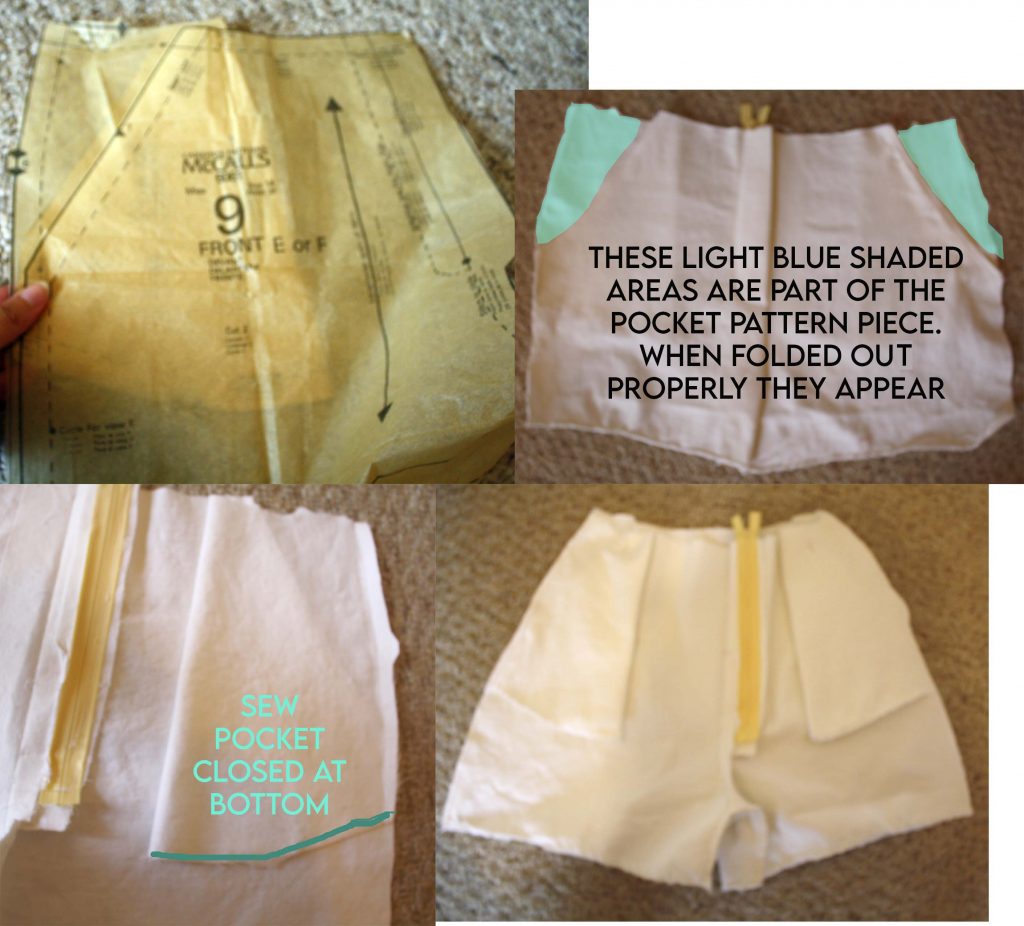
Pockets – This was also my first time ever doing front pant pockets. My best advice is to take a moment to play around with the pattern pieces 9 and 10, and visually piece them together so you can see the way the pocket becomes part of the shorts, upper front side( I hope my pictures below will help demonstrate what I mean). Visually laying and folding the pockets out really helped me solve the puzzle.
The final goal for today’s session is to assemble the pieces. Sew the center back seam, sew the front to the back at the sides, and sew the inner legs inseam.
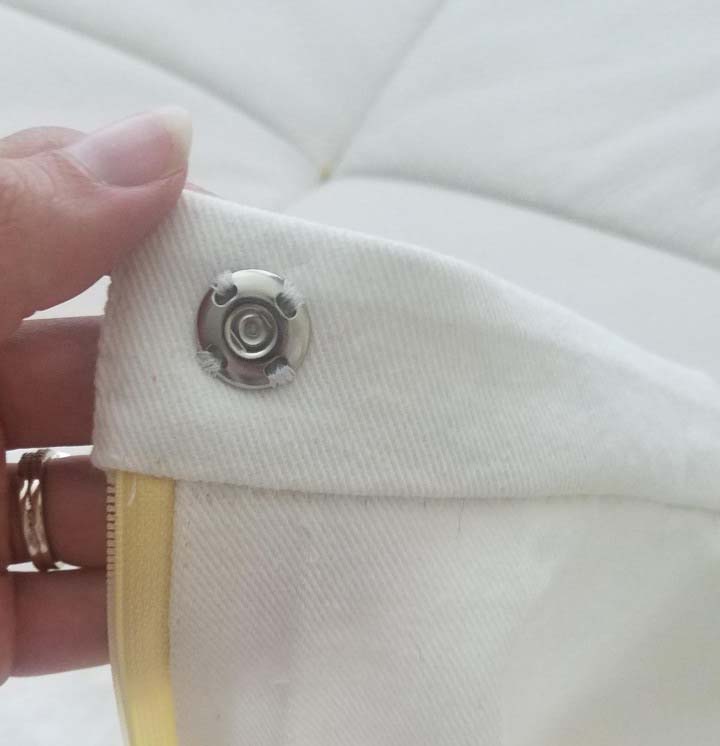
Day 3 – Fitting, Waistband, Finishing
Today is my favorite day because the hardest parts are over and today we can wear our final product! Today we will:
Tailor the shorts to fit perfectly
Refine the interior work – serge seams, cut threads, etc
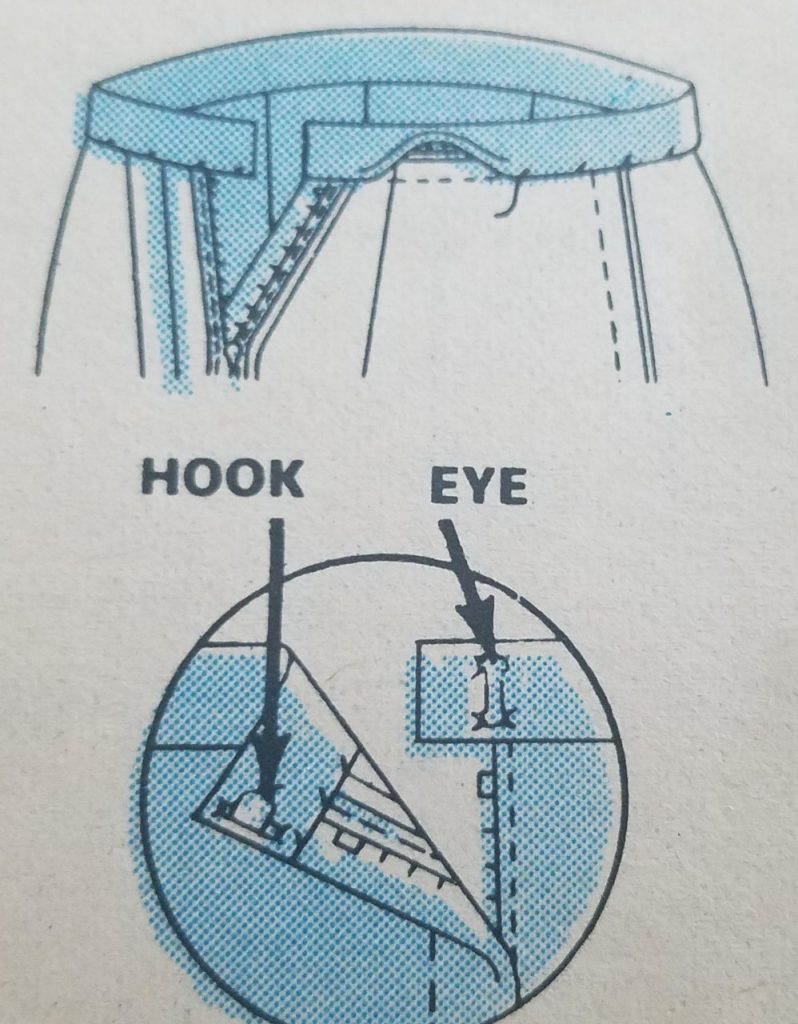
Install the waistband
Affix a snap closure
Decide on the length and hem
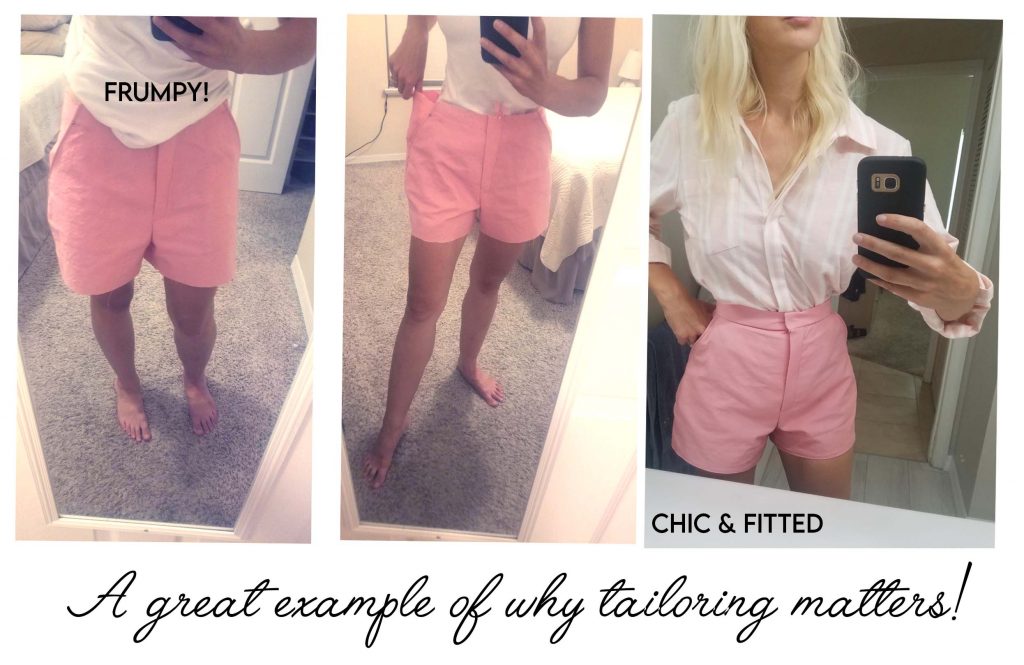
Yesterday you will have finished assembling the pattern pieces so that today you can actually try on the garment. At this point I do not expect it to fit my body. I chose to use a pattern that was sized for the widest part of my hips, so it can be expected that the waist will not be correct.
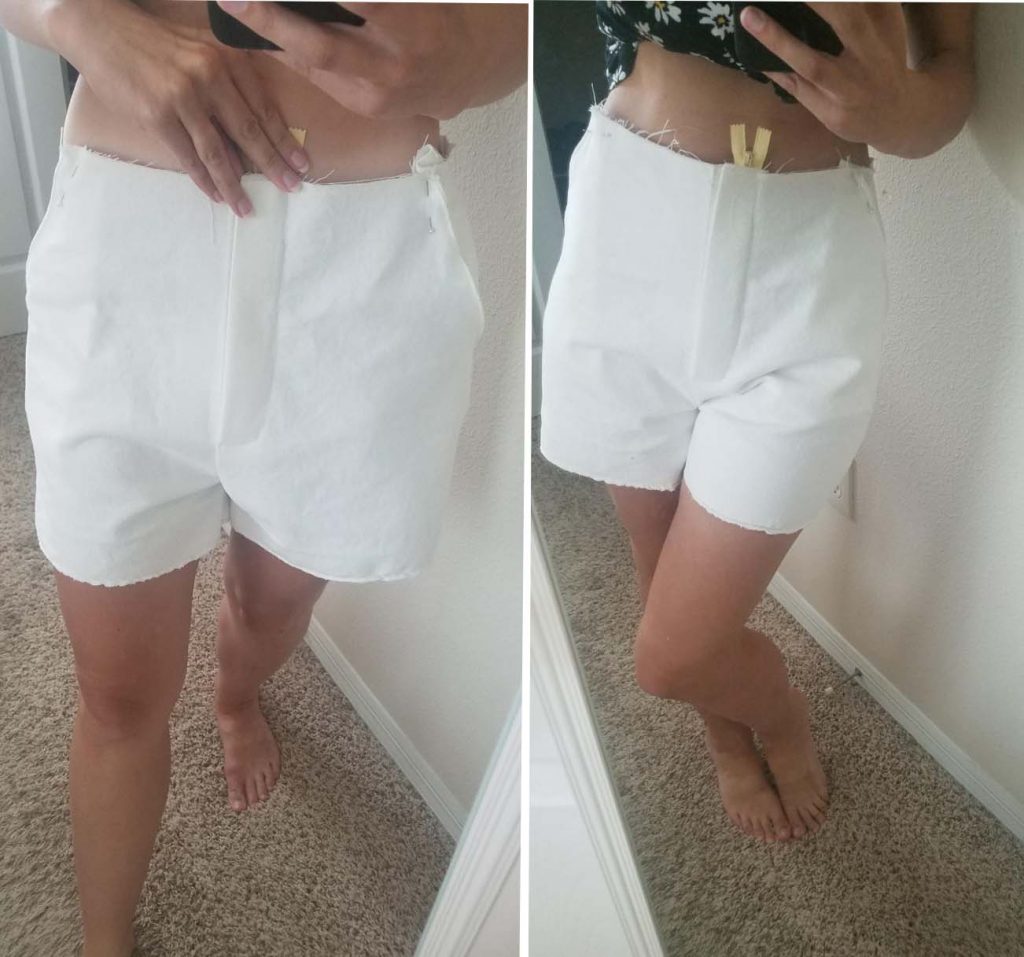
At this point I actually turn the garment inside out and zip it up from the inside. I then pull the shorts up to where they should ideally ride, and I pinch and pin both sides (trying to keep my fabric pinching equivalent on each side). I make sure to pin a point to mark where my hips are at their widest, so that I know to NOT whittle away that area on the sewing machine, or else they will not fit me.
Next I take them off, and sew the shorts along my new pinned marks, cutting away the excess. I repeat this process several times, continuing to try them on, then sew them, try them on, then sew them. I also take some fabric in from the center back. This part of the project is really important because it is where the real magic happens where you can make them extremely custom to your body. It makes a big difference in the overall finished look, and we tailor them before sewing on the waistband.
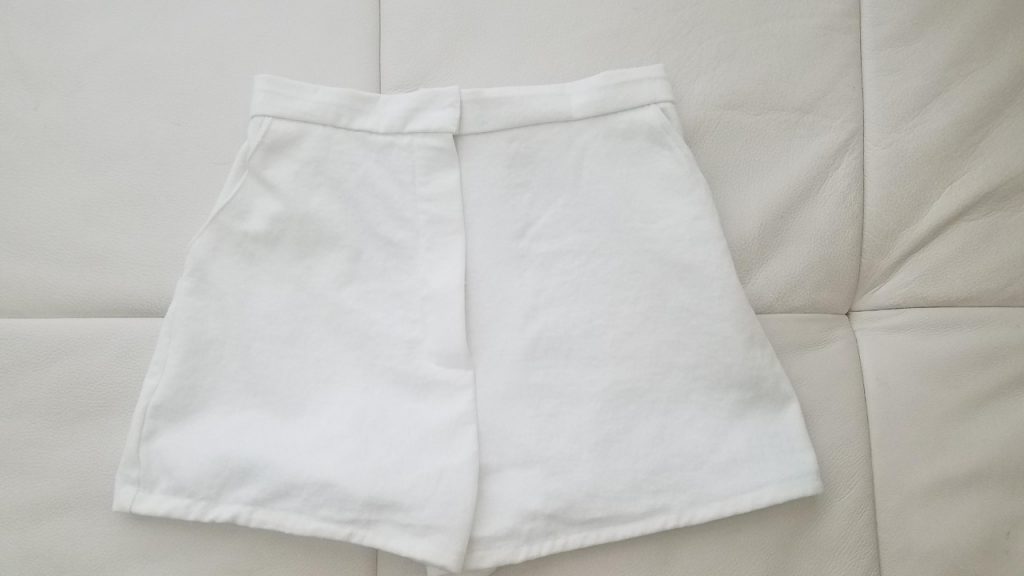
I hope you have enjoyed sewing along with me on this vintage pattern, or at least that you have enjoyed seeing how they were made. Soon I will post some pictures of how they can be styled in outfits.